Even also on an uneven base: RAKO Outdoor flooring on adjustable pedestals.
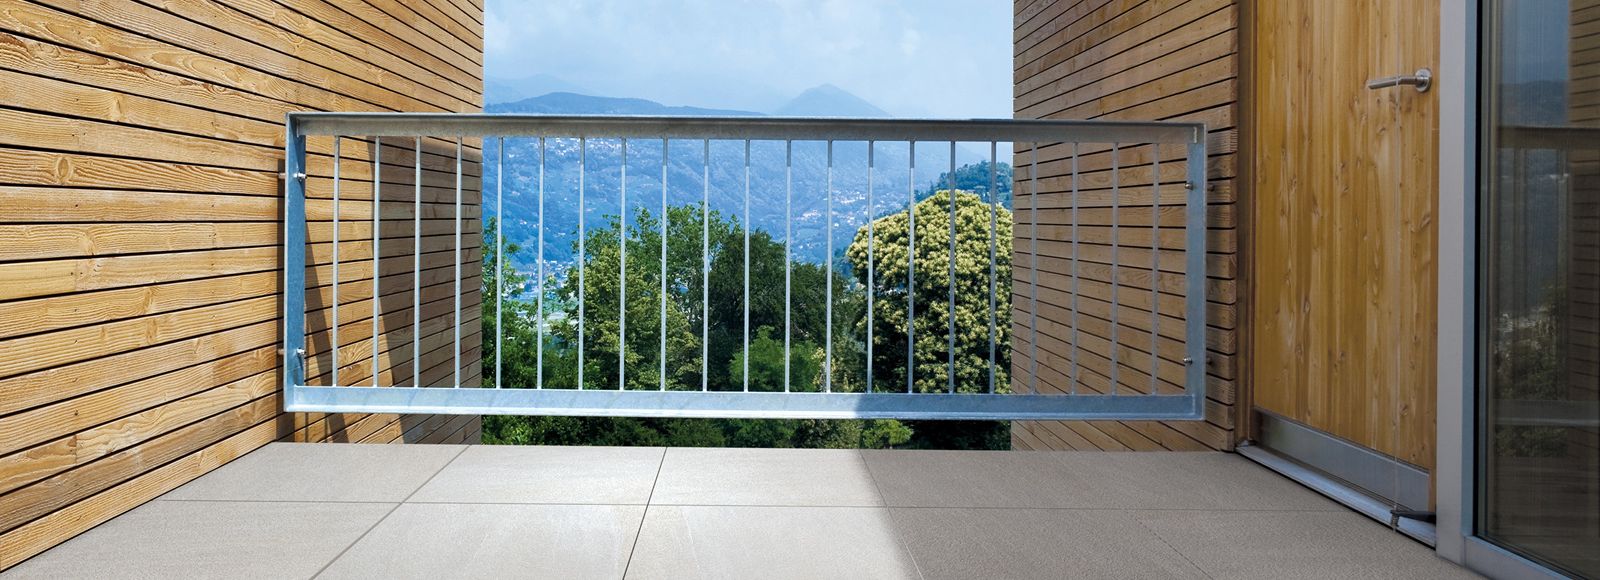
The primary requirement for excellent resistance of the balcony floor covering is met perfectly by the ceramic floor on pedestals. The structure is solid, stable and possesses a high load-bearing capacity, and it drains water easily. In addition, it can be disassembled at any time to reach the base. The adjustable pedestals can also adapt to a solid but uneven base. The new RAKO OUTDOOR ceramic tiles add both elegance and durability to the wear layer. Thanks to the reinforced thickness of 2 cm, these tiles can be laid without the use of adhesives or grout on plastic pedestals or just simply in gravel or grass. The tiles, with their faithful wood or stone look, correspond in design to the RAKO floor series and thus allow you to connect to residential rooms and unify the transition from the interior to the exterior.
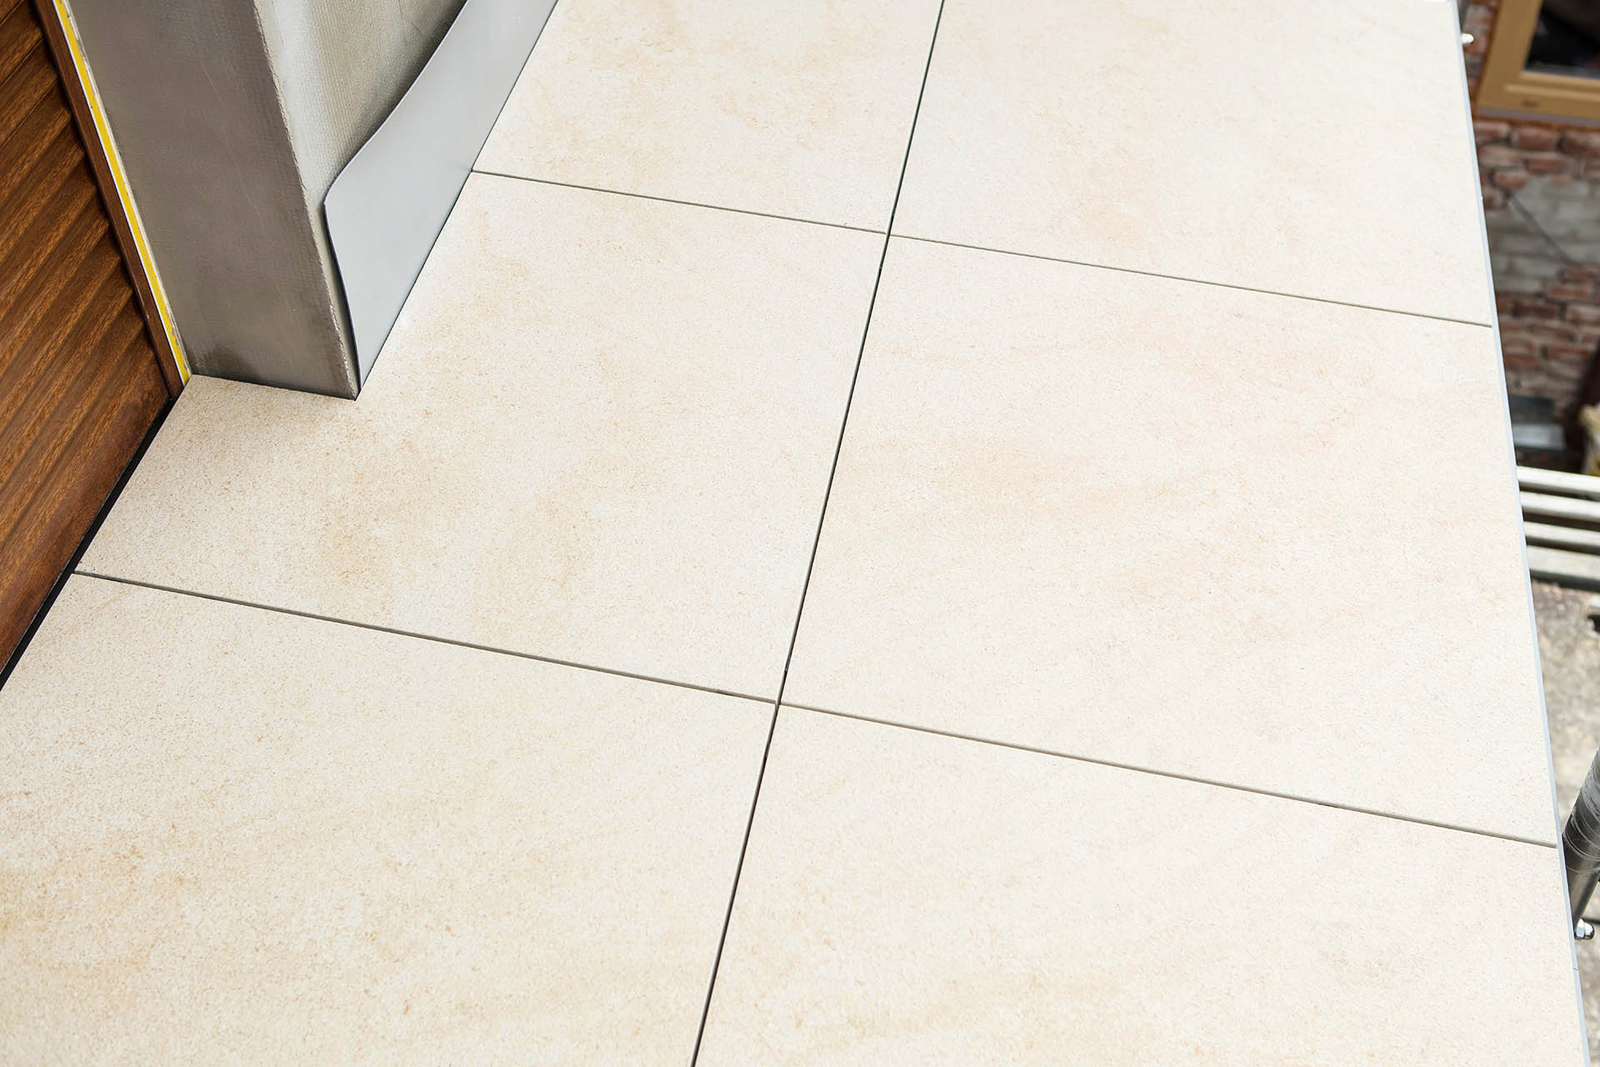
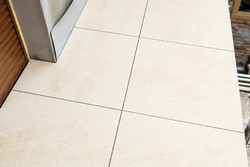
The RAKO Outdoor sintered tiles 60 × 60 x 2 cm in size are frost-resistant and can withstand outdoor loads without any major limitations. Thanks to their fine relief and R11/B slip resistance, they are suitable for building or renovating modern terraces, balconies, pool surrounds, pergolas, roofs or walkways. Their thickness and weight make them suitable for laying directly on the ground, for example, into a lawn, gravel or on plastic pedestals without the use of any adhesive or grout. Thanks to digital printing technology, the quality and design of the RAKO Outdoor tiles are indistinguishable from the natural materials they imitate so faithfully. The attractive Burlington stone pattern can be found in the Quarzit Outdoor series, the slate look in the Kaamos Outdoor series, design of concrete in the Rebel Outdoor series, terazzo image in the Piazzetta Outdoor and the wood design in the Saloon Outdoor series. RAKO Outdoor tiles are environmentally friendly products with minimal environmental impacts (EPD, LEED certifications).
Advantages of adjustable pedestals and their use
Adjustable pedestals enable both their height and inclination to be adjusted. The slope can be as high as 10% when using pedestals with telescopic heads. This makes it easy to level a firm but sloping base. This suspended floor has minimal maintenance requirements, ventilates very well, and the space underneath can be used for various installations. The structure can be repaired or completely dismantled if necessary.
How to lay the OUTDOOR tiles on adjustable pedestals?
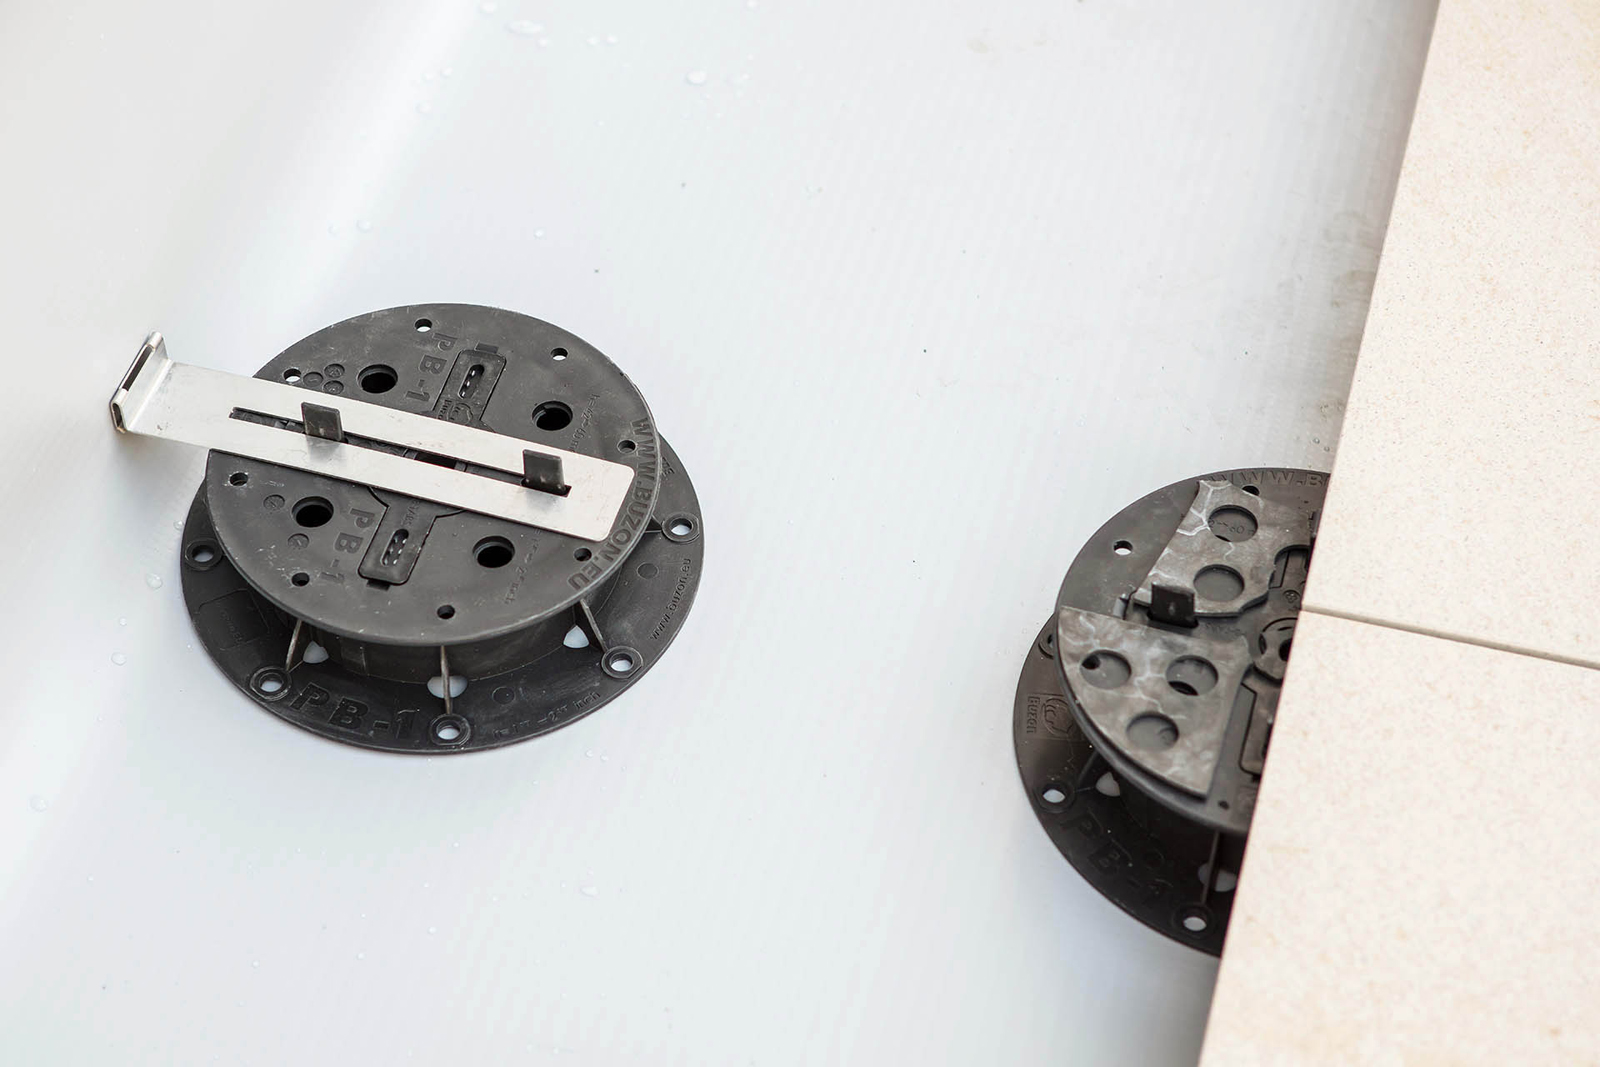
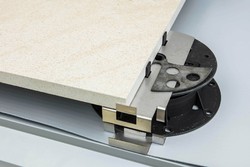
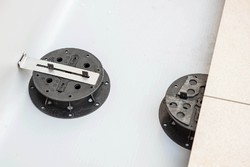
You can choose from a wide range of polypropylene-based pedestals up to 100 cm high, resistant to high temperatures, UV radiation and frost. Depending on the type, the pedestal load capacity ranges from 500 kg to 1,200 kg. Some bolted pedestal solutions include a wrench that allows the pedestal height to be adjusted from the outside without any pavement manipulation. Spacers in the pedestal head are used to define the joints between the tiles within the range of 2–4.5 mm. The joints ensure that water drains and evaporates without disturbing the pavement look. The number of spacers on the pedestal heads can be adjusted as required. If a flexible base is used, the structure rigidity can be increased by means of beams laid on top of the pedestals or by inserting an extra pedestal in the tile centre.
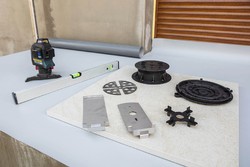
Laying on adjustable pedestals is a system of laying 2 cm thick tiles and adjustable supports, called pedestals. Prepare the required number of pedestals, including slope correctors and spacers, rubber pads, stops or skirting clips, 2 cm thick RAKO OUTDOOR ceramic tiles, spirit level, and cutter.
A waterproofing PVC sheet with a reinforcing grid, ≥1.5 mm thick, is recommended for the base. Underlay the PVC sheet with a geotextile to reduce the risk of the sheet being punctured by sharp points on the concrete surface. The concrete base slab should have a slope of 2% from the building. Entrust the PVC sheet installation procedure to a professional.
Another option for insulating and sealing the concrete body under the pedestals is to use a final waterproofing screed that resists water and sunlight. The product can be found in the RAKO SYSTEM range under the brand name SE2.
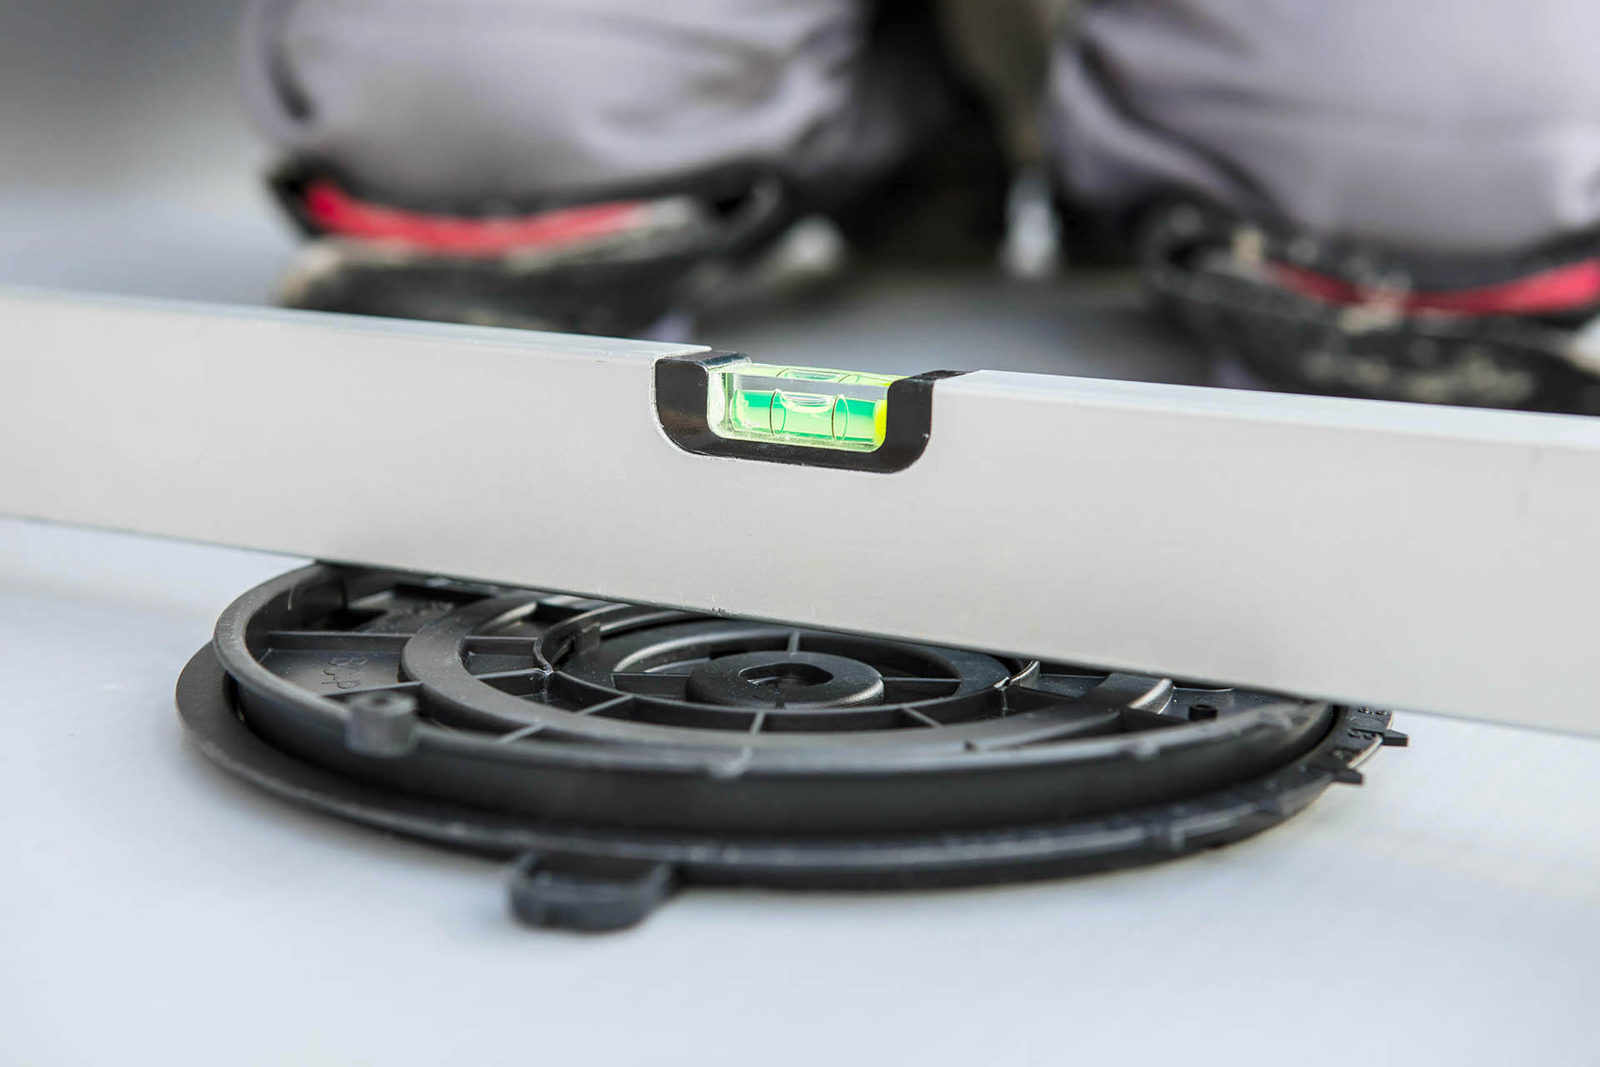
Adjust the horizontal base under the pedestal by turning the slope corrector. In this manner the base slope can be set to ≤5%. Every pedestal must be adjusted individually because the inclination angle and slope direction of each pedestal are different. Supports equipped with telescopic swing heads will adjust the slope automatically up to 10%.

Insert the pedestal into the slope corrector. The required pedestal height is then adjusted by rotating it based on the pedestal height at the highest point of the terrace or balcony.
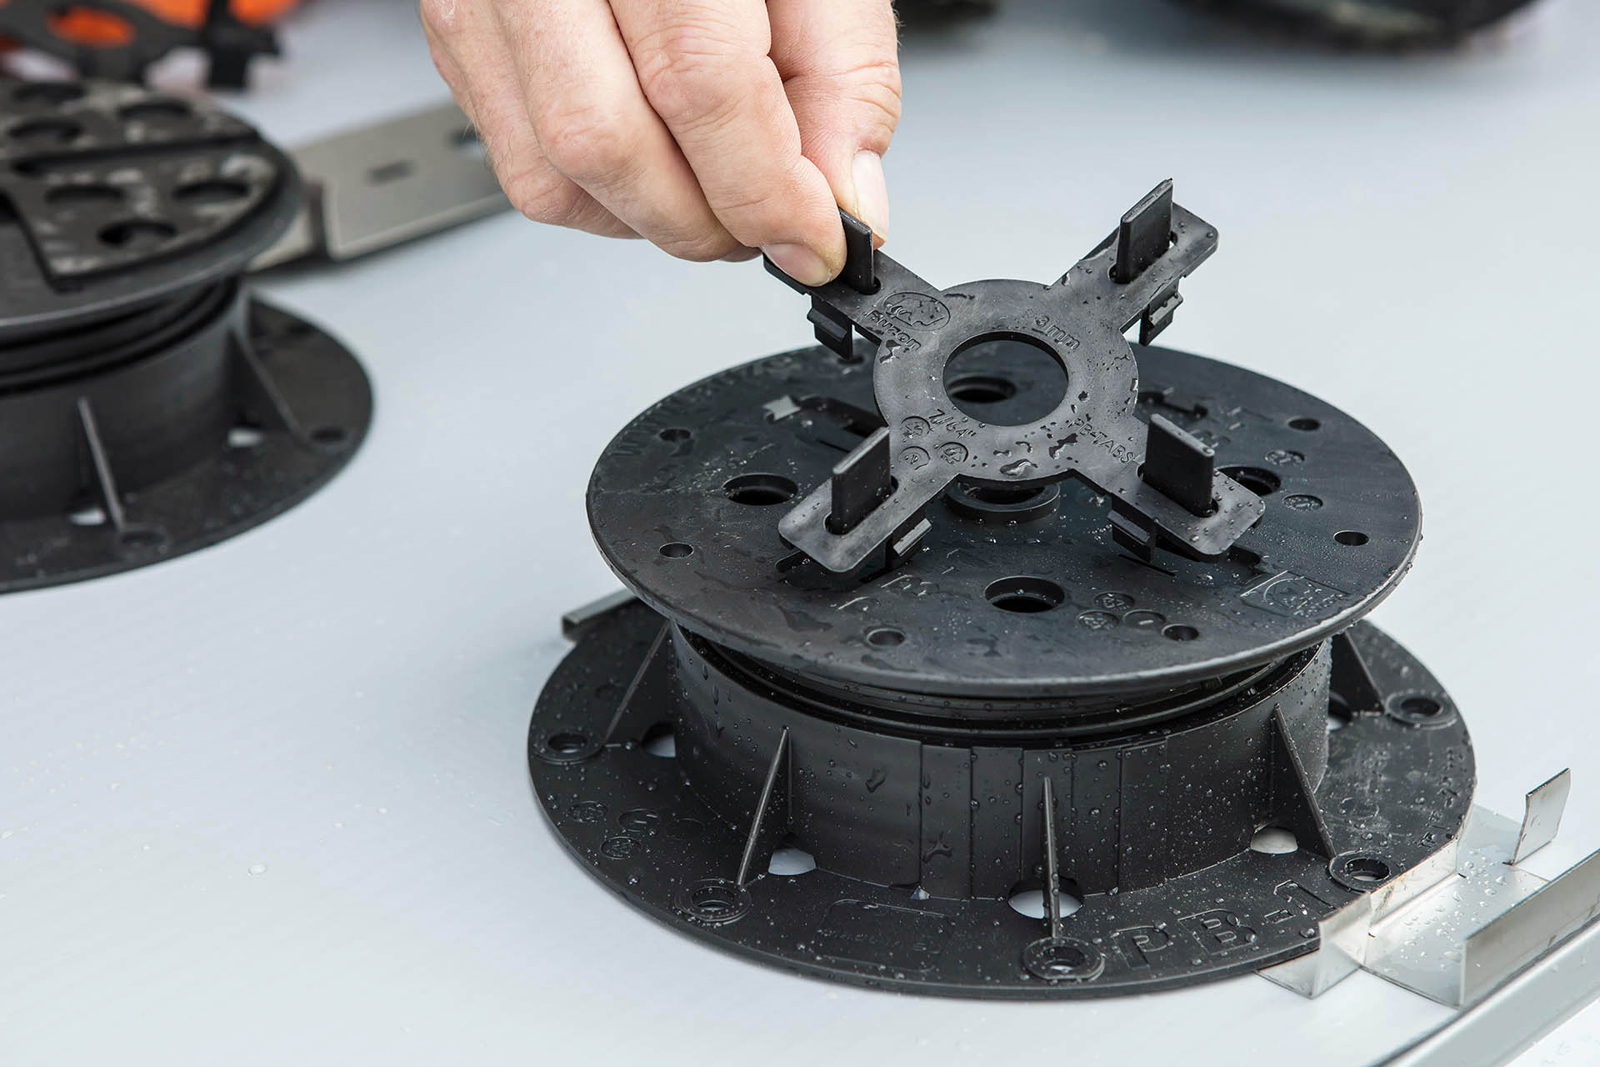
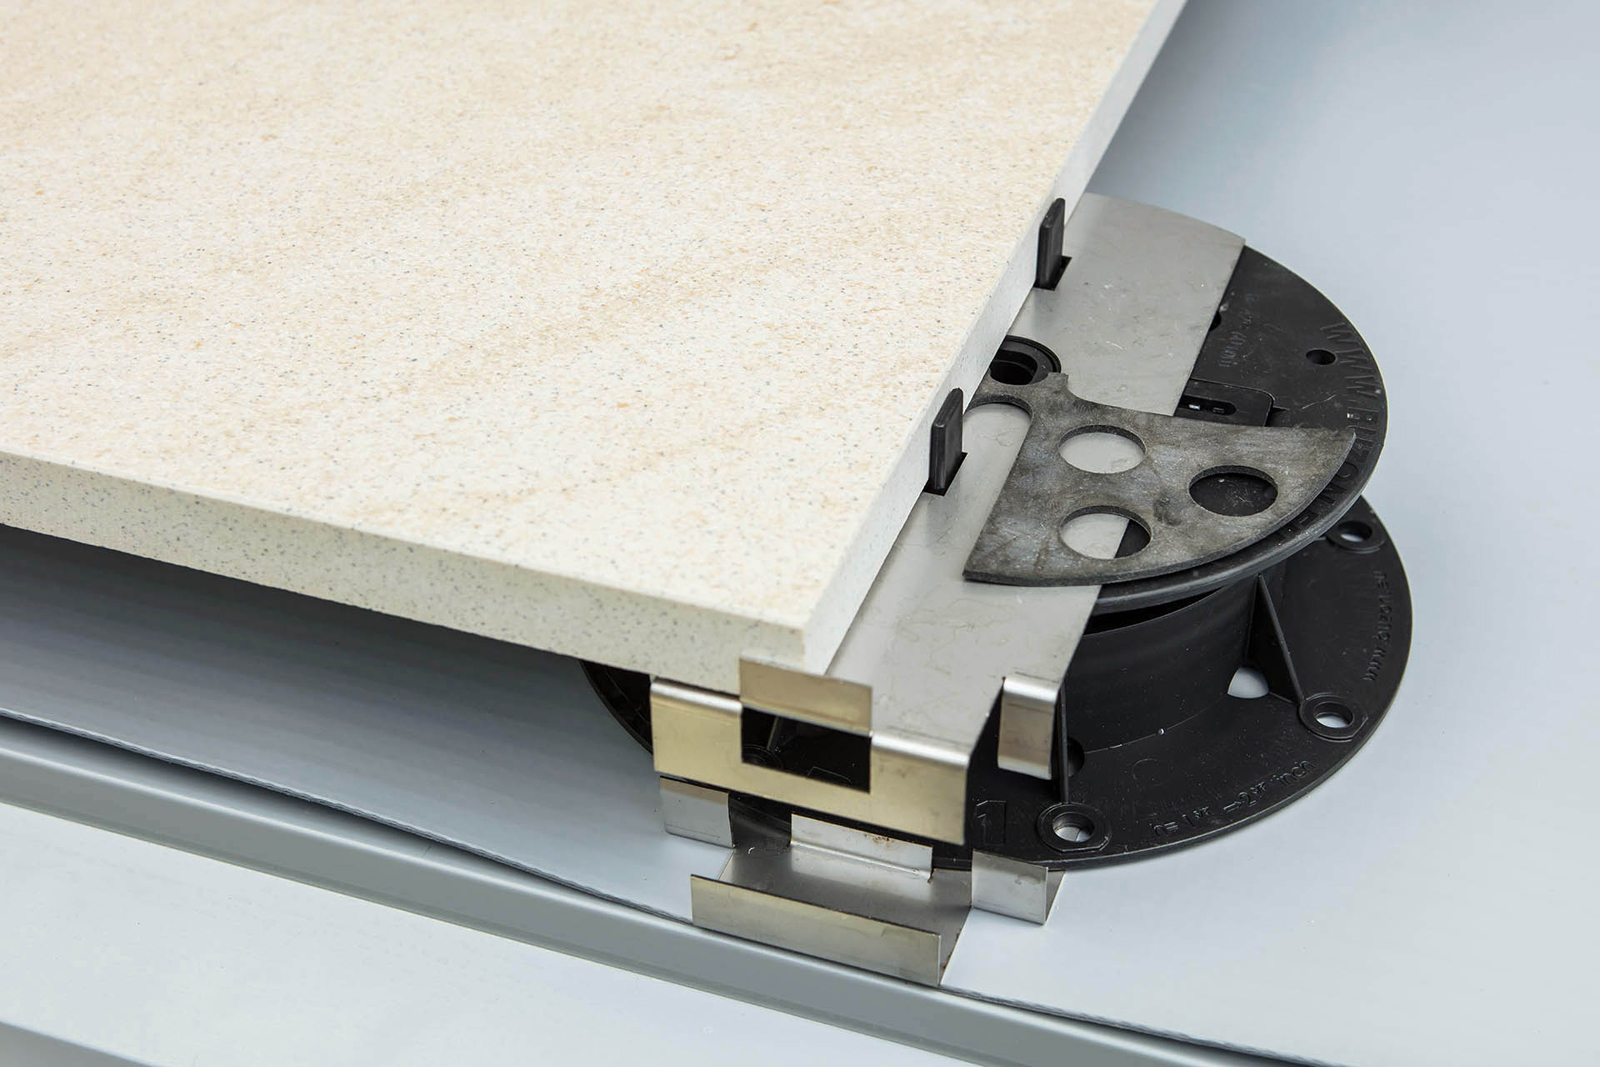
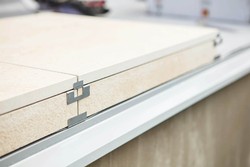
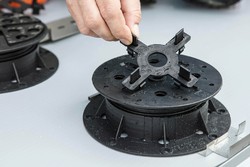 Put the expansion spacers onto the pedestal and adjust their number as required by cutting or breaking them out. The spacers define the joint width as it is necessary for water drainage and evaporation. We recommend selecting the spacer width at 3 mm as a minimum.
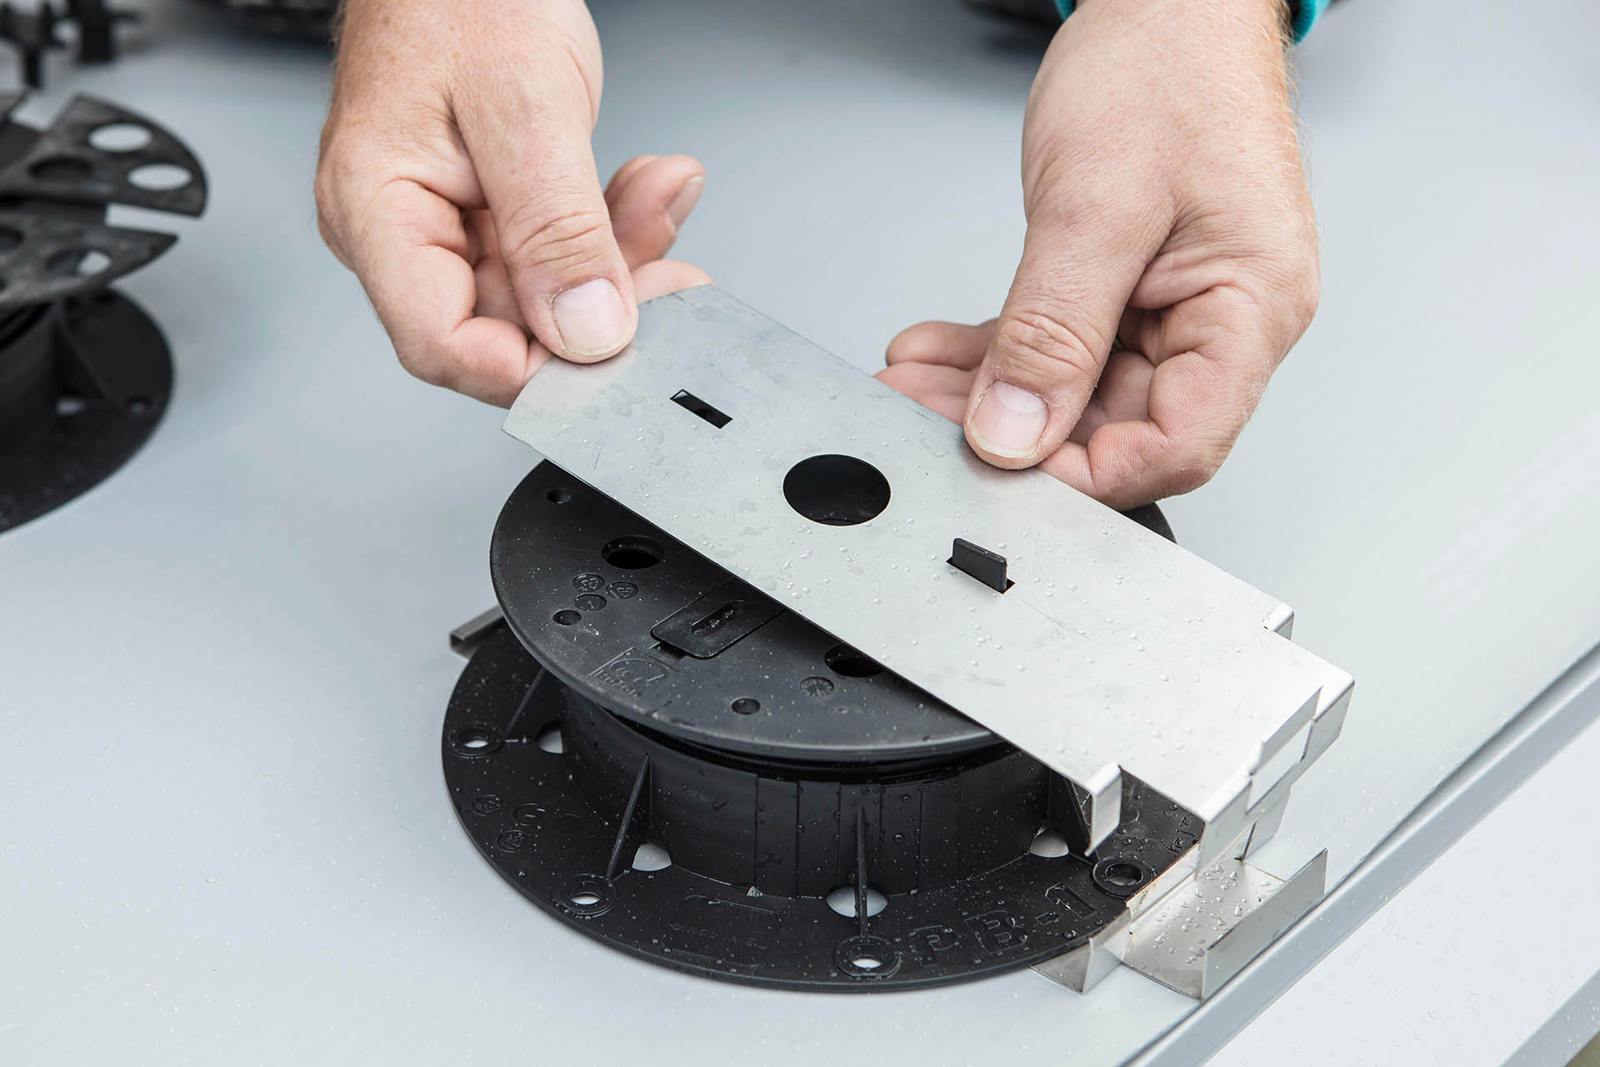
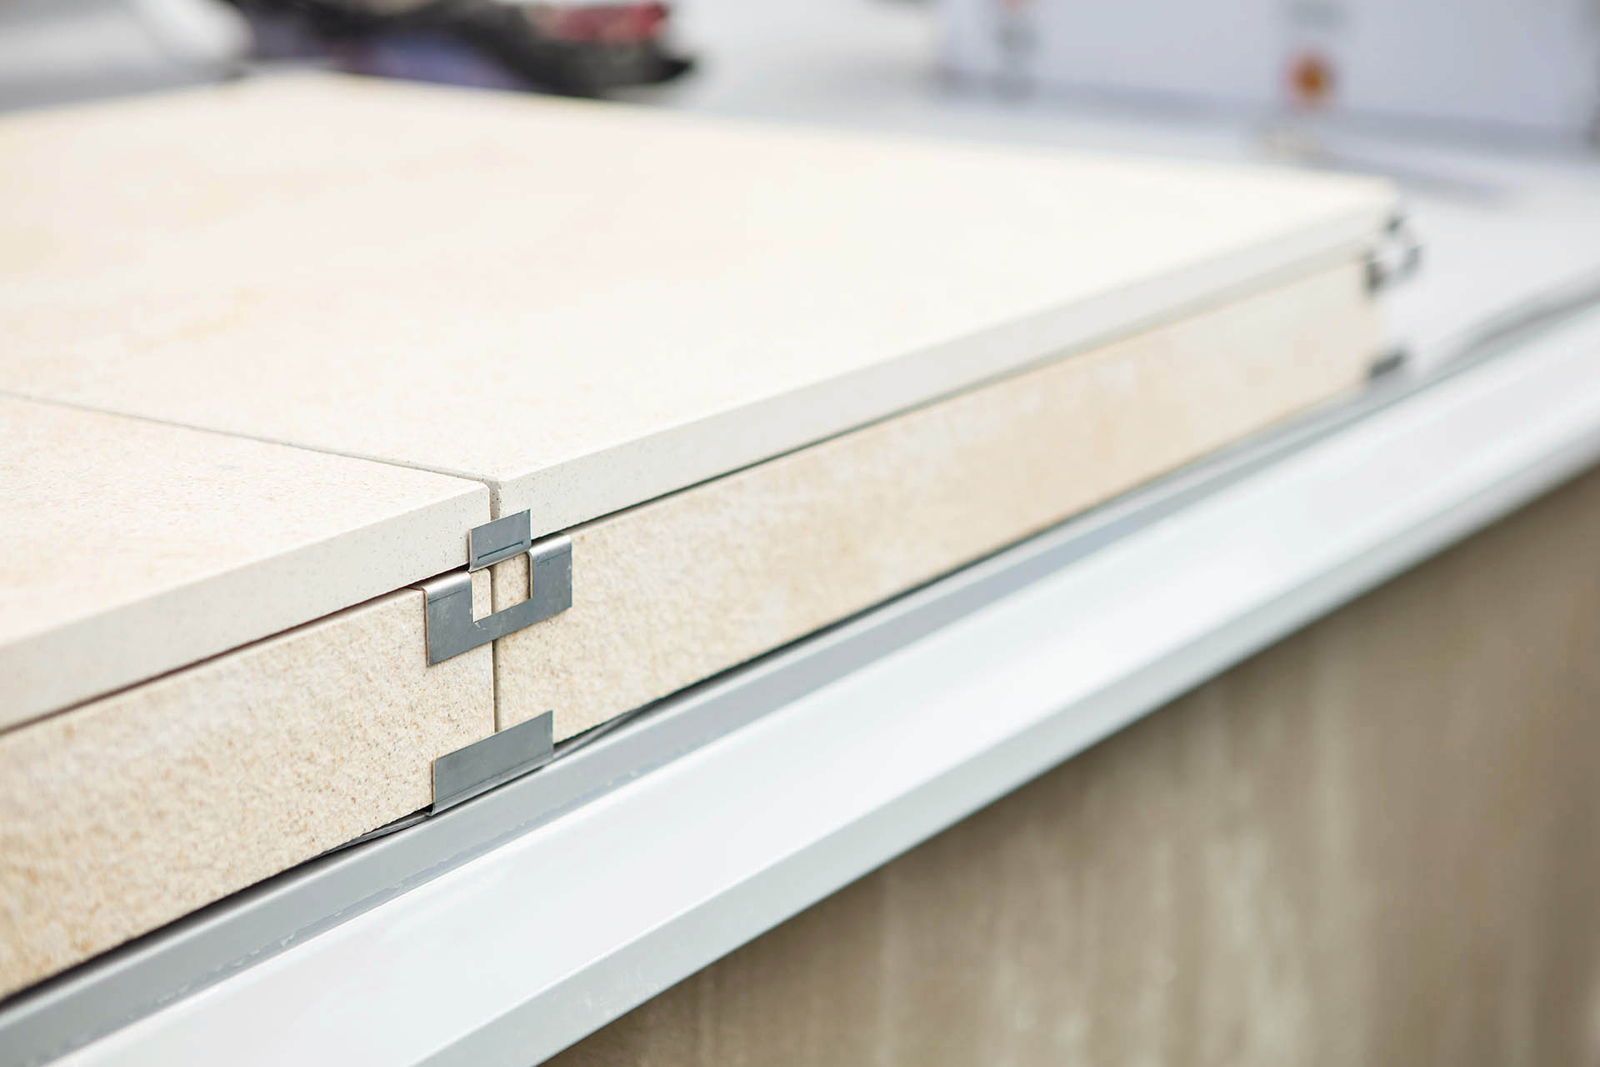
 If the paving has no solid bordering, such as a plinth or wall, create the face by using skirting clips, placed both on and under the pedestal head.
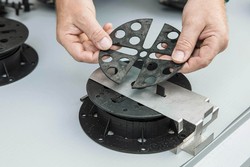 Put rubber pads on the pedestals for cushioning and to allow the tiles to settle.
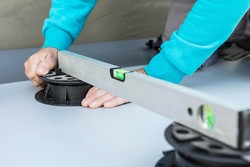
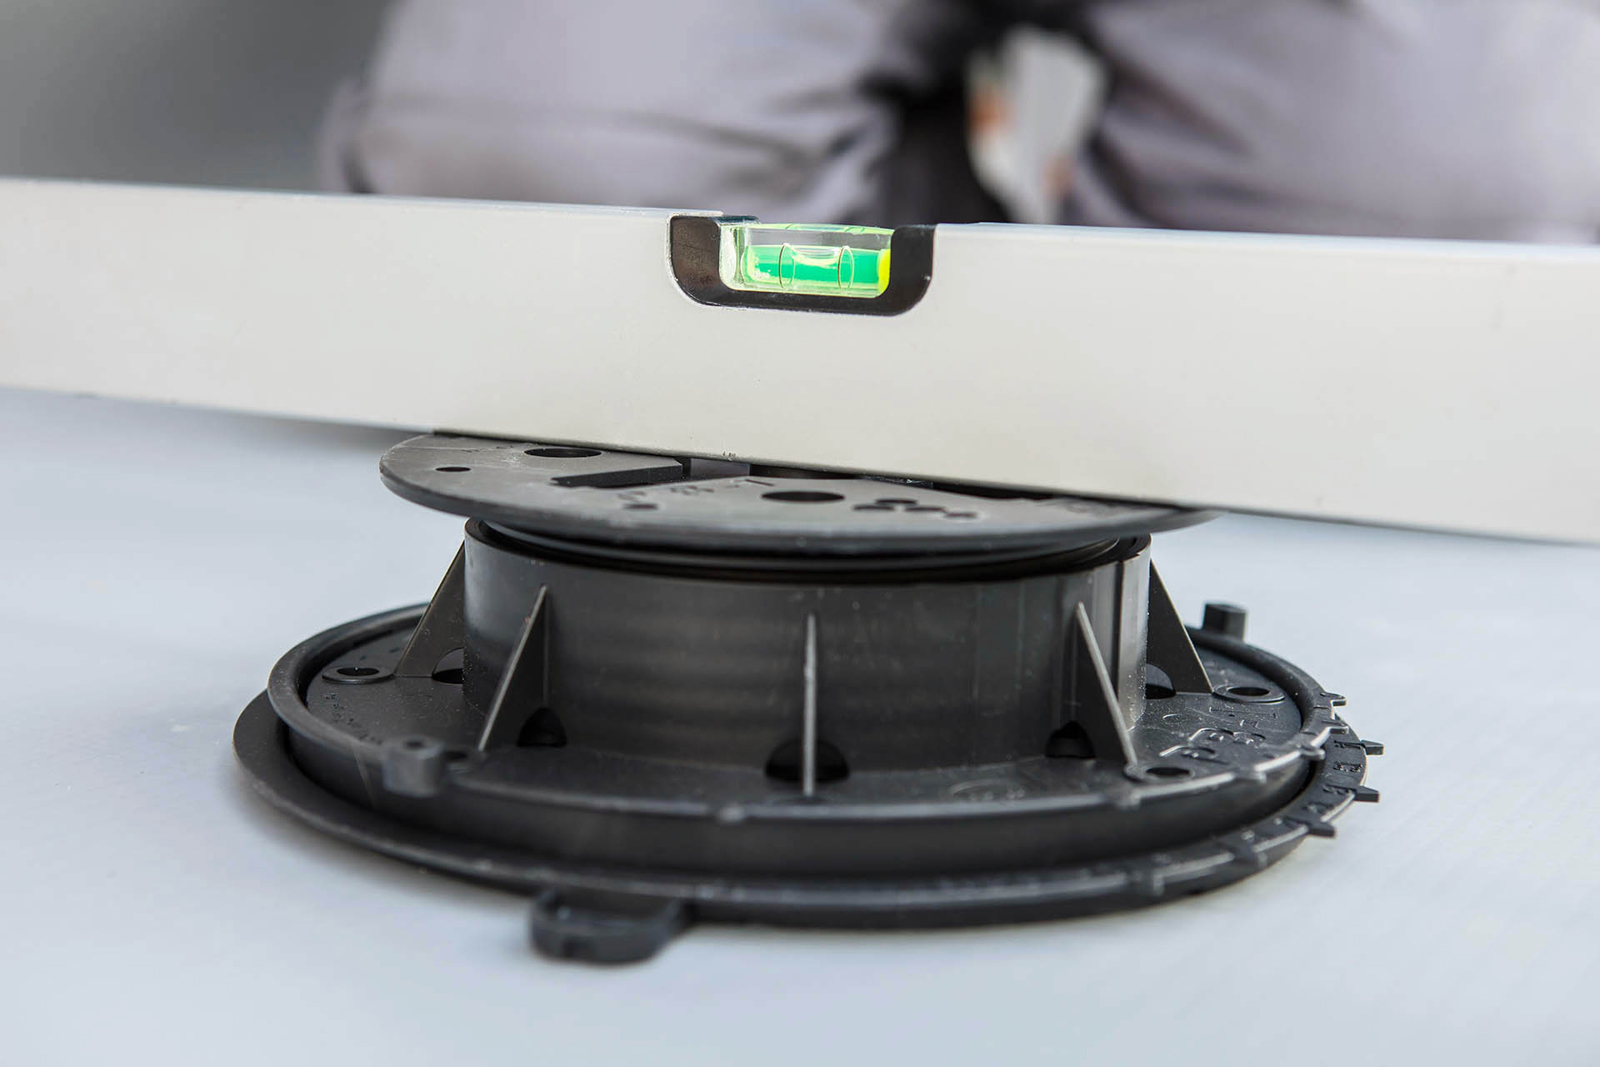
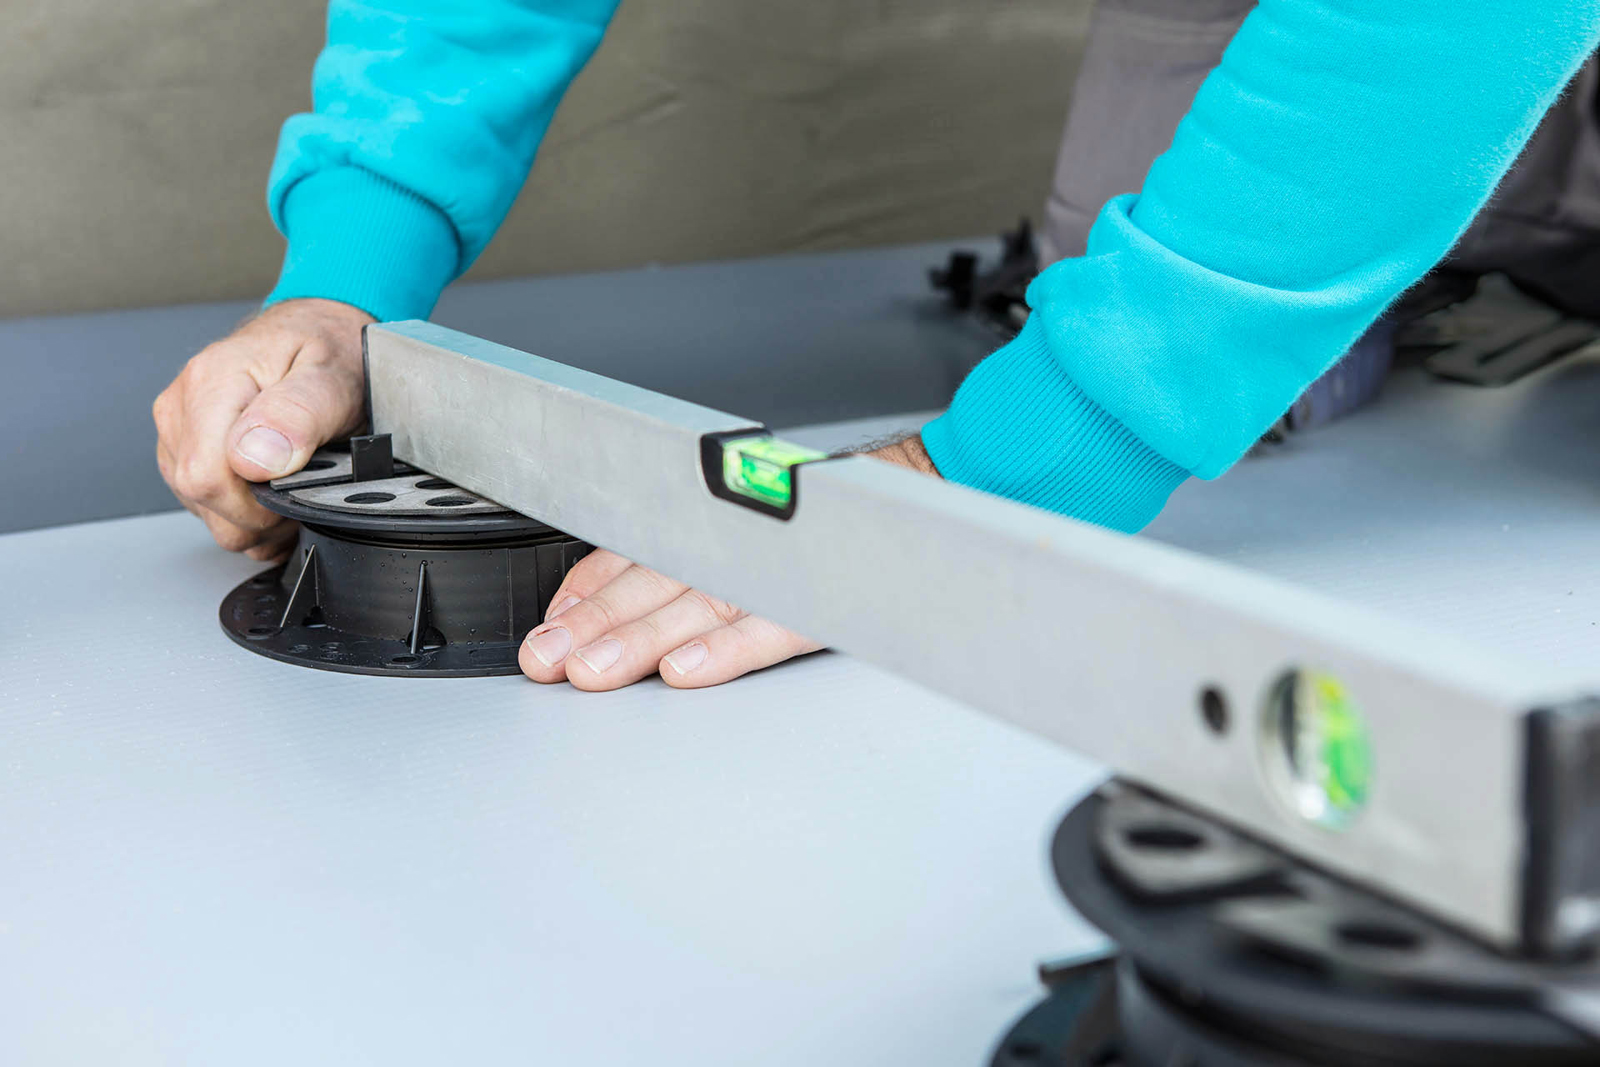
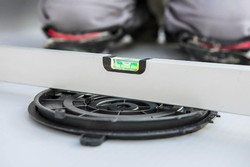
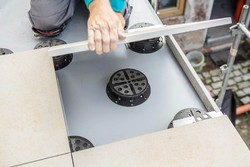
Use the spirit level or a laser beam to make sure the pedestals are well aligned. Where they are not, rotate them to align them.
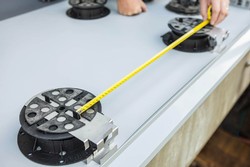
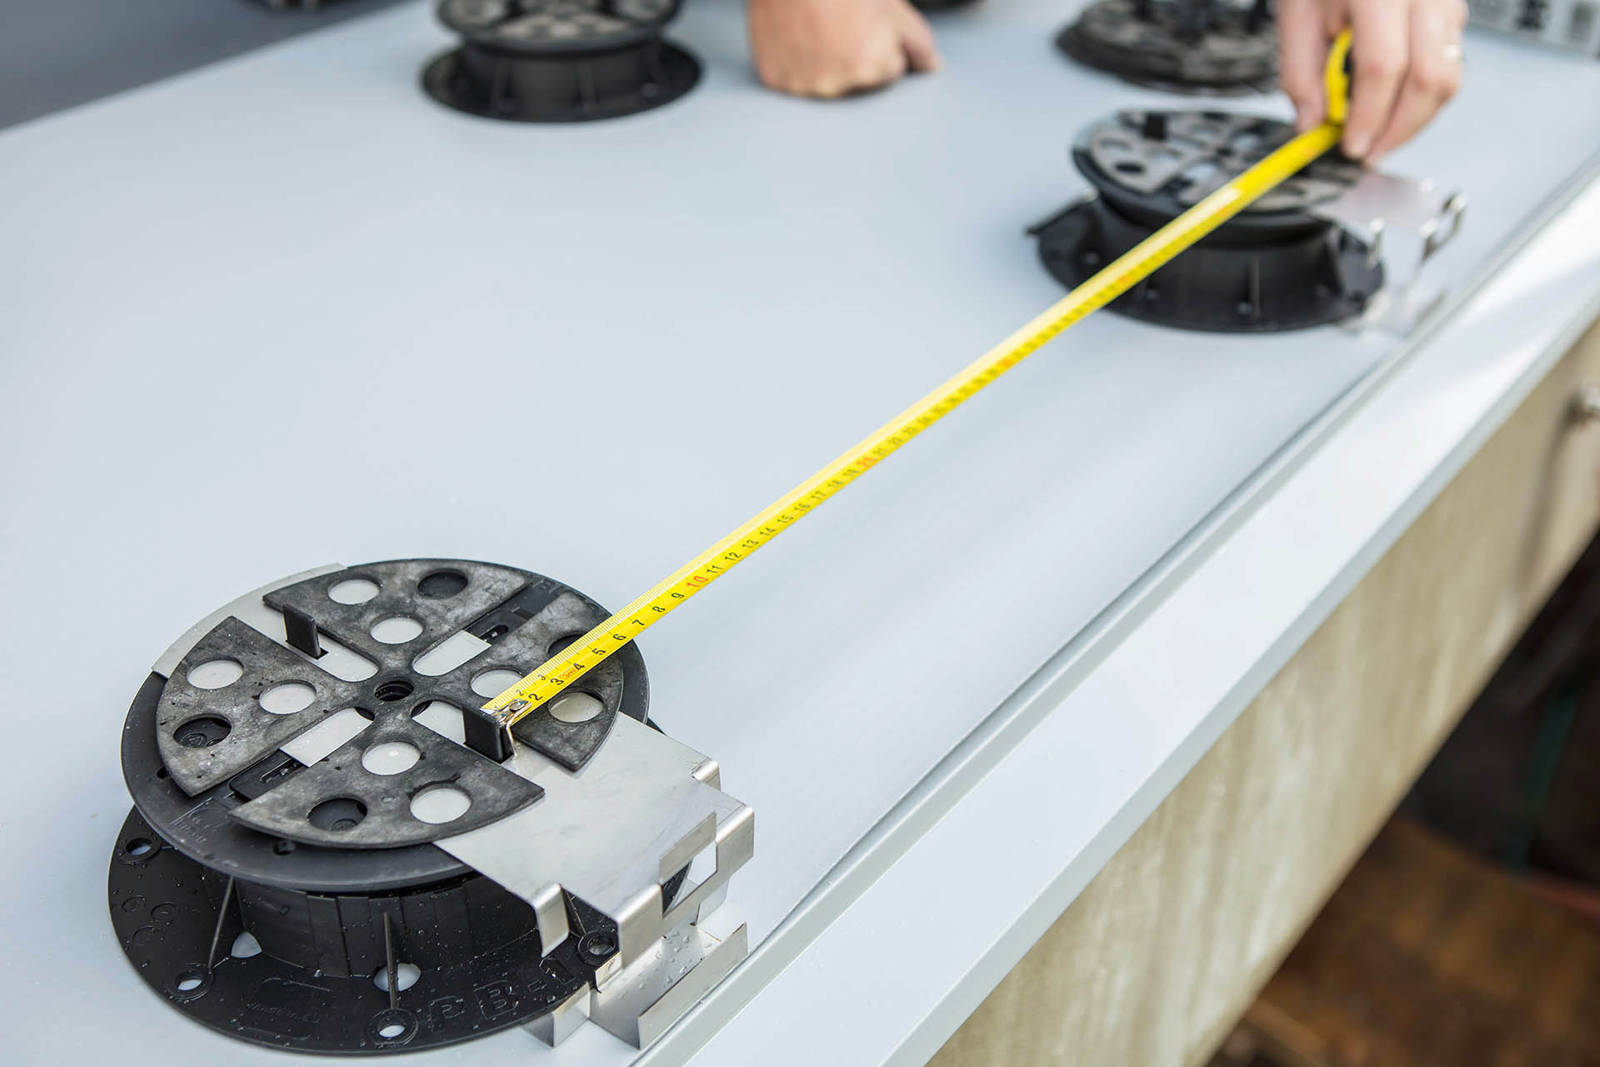
Before laying, check the distance between the pedestals to make sure they match the 60 cm × 60 cm tile size.
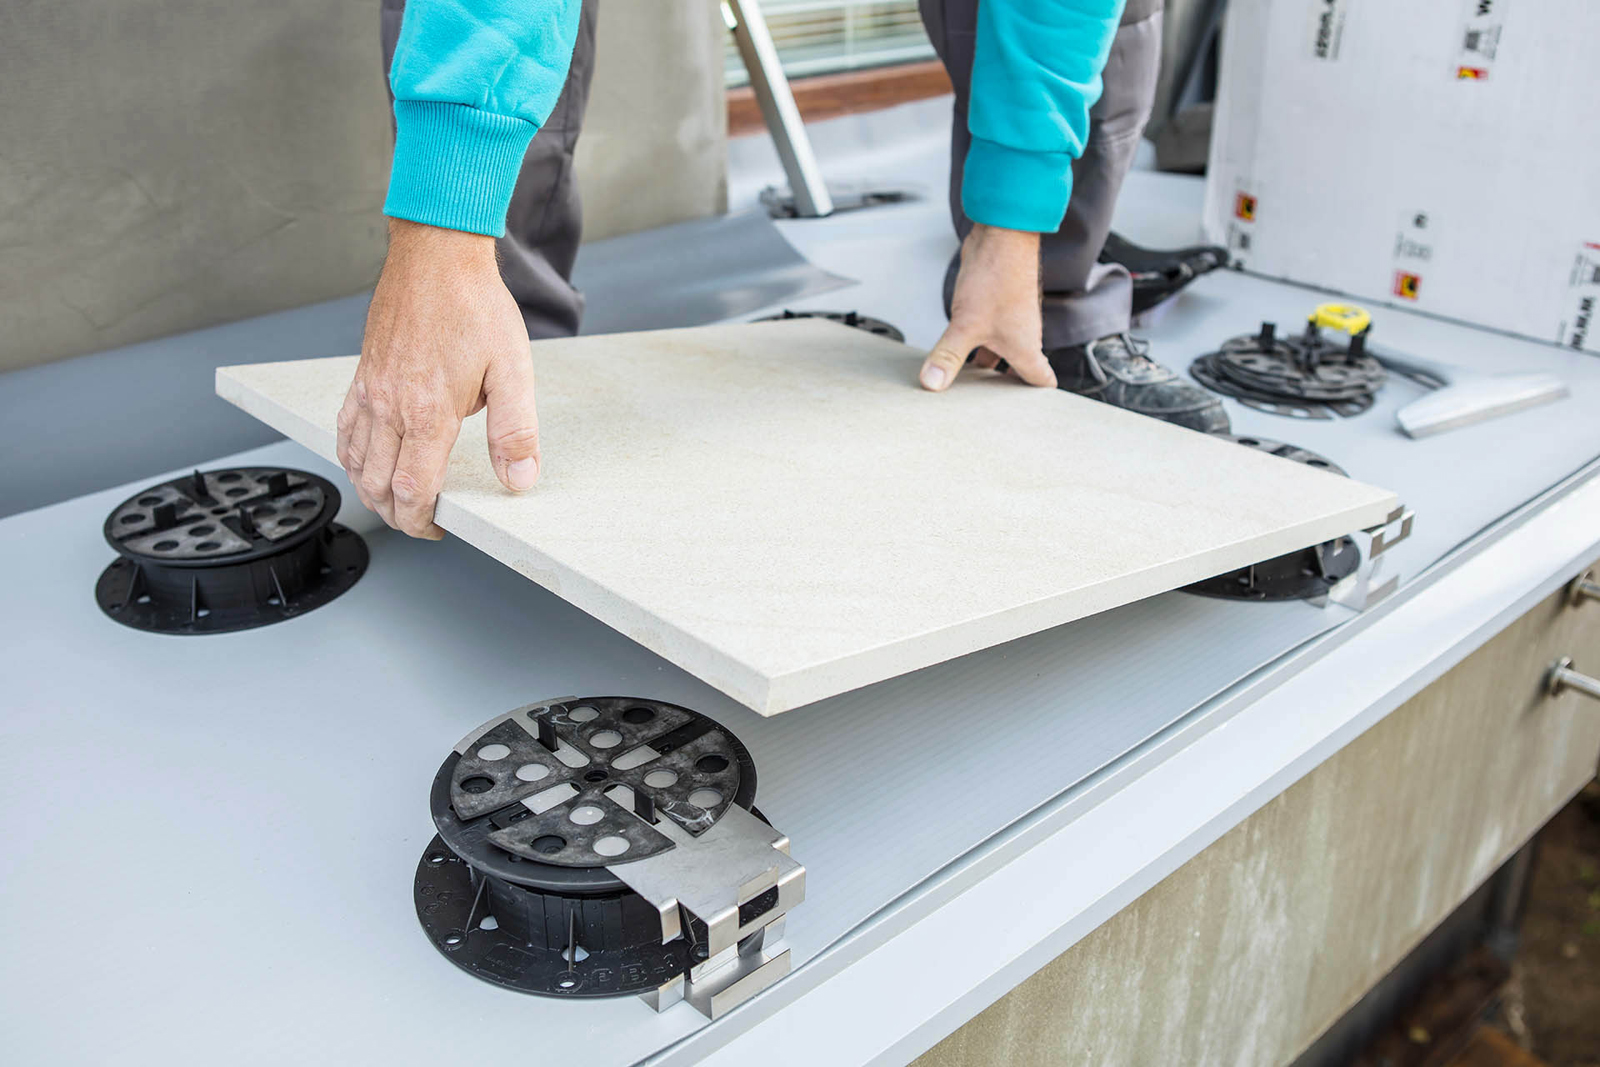
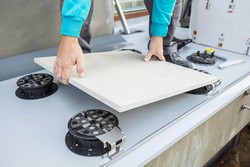 Now lay the tiles on the pedestals. Handling a tile weighing 16 kg is more difficult than working with normal thickness formats. After laying a row, make sure the tiles are horizontal.
 Repeat the steps in the subsequent rows of laying.
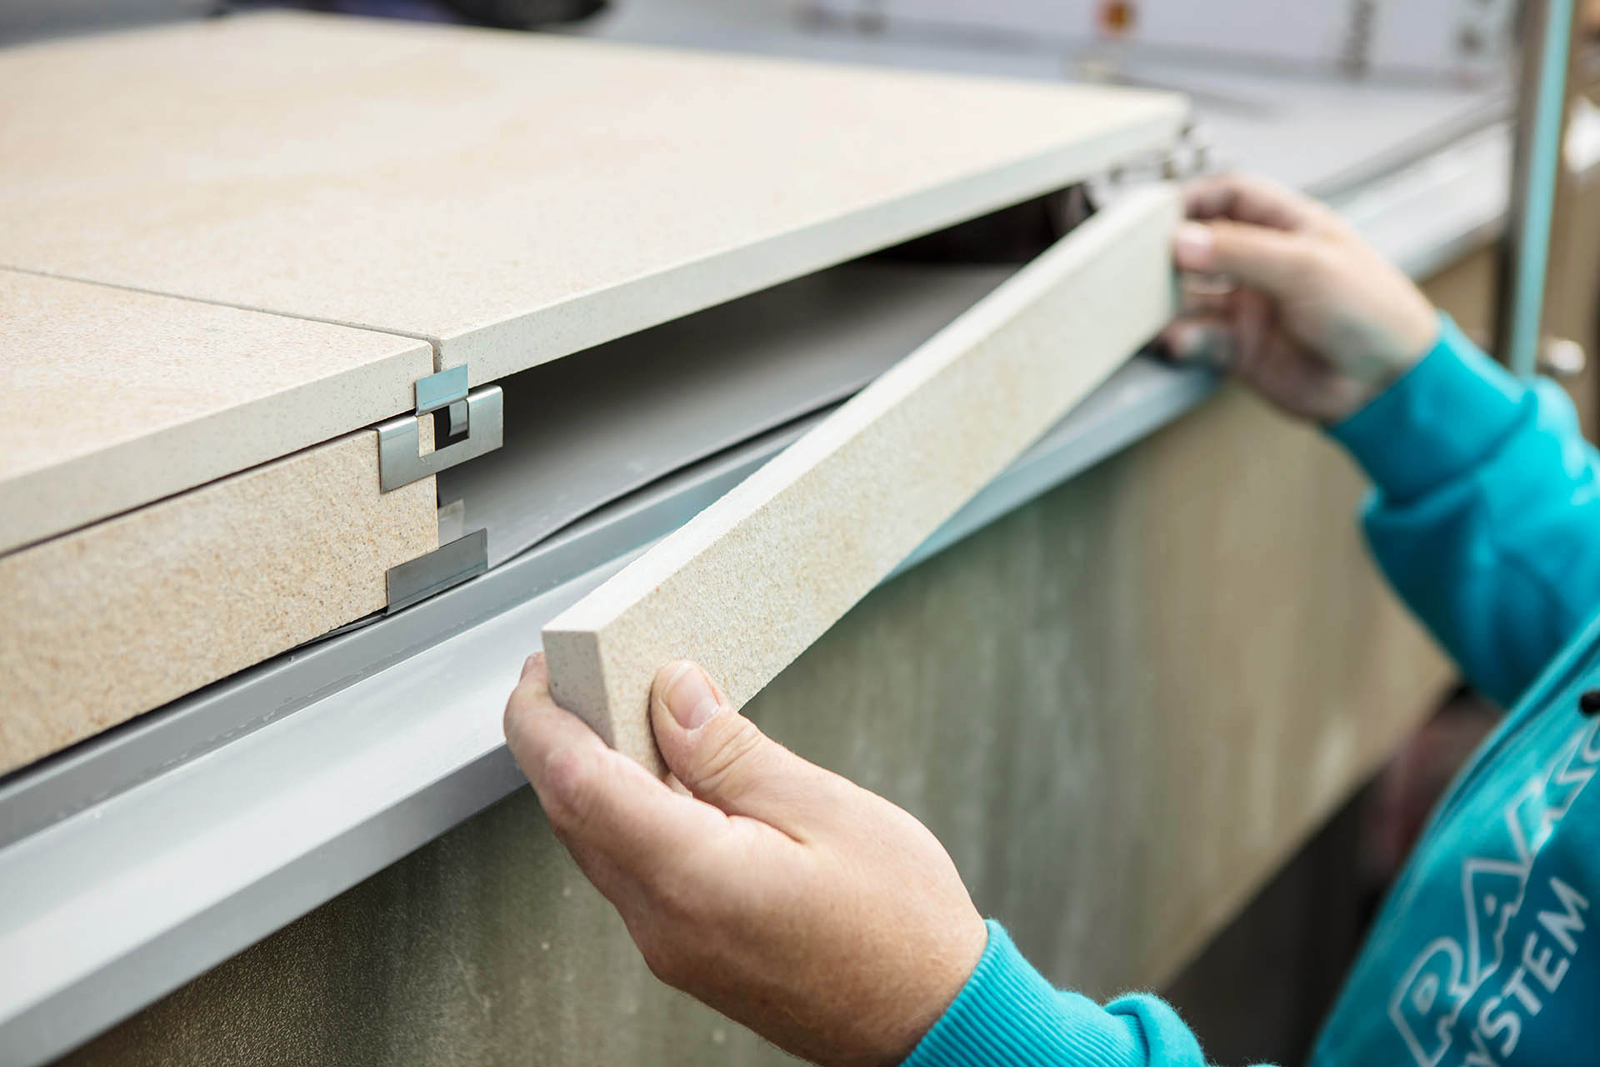
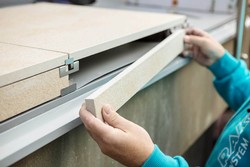
 Cut ceramic strips for the pre-prepared skirting clips to form the balcony or terrace face.
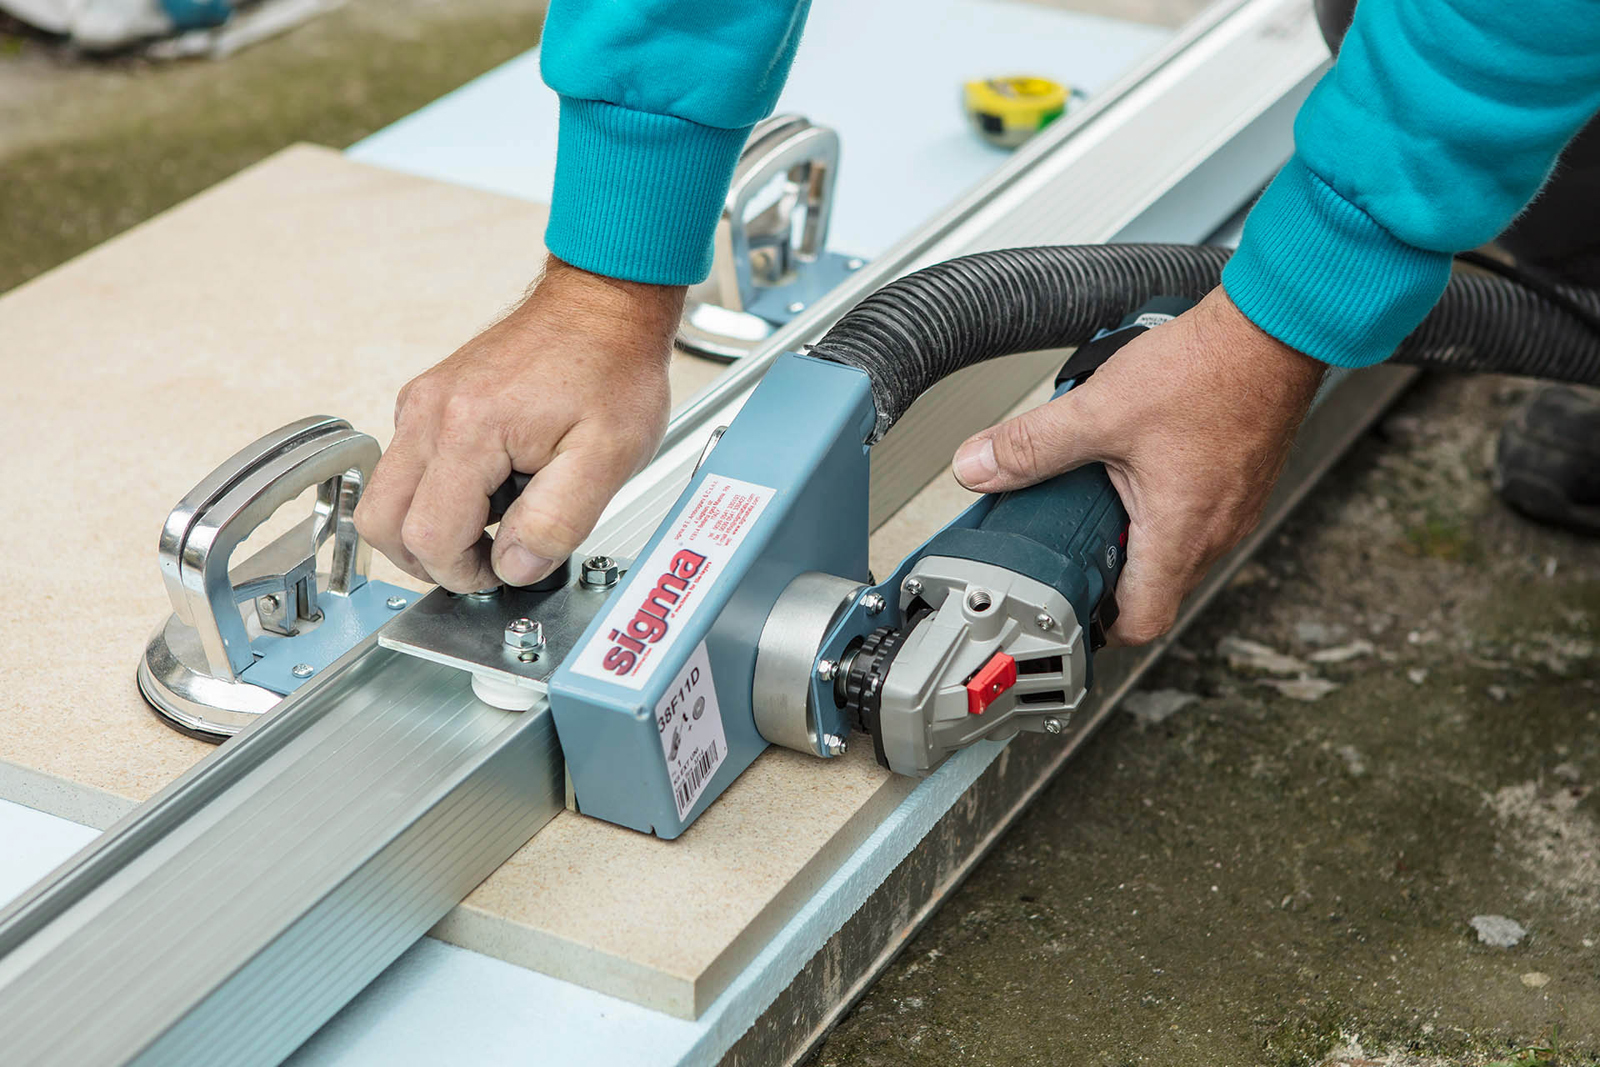
 Use an electric cutter with guide rails or a water-cooled stand saw to cut the 2 cm embossed tiles.
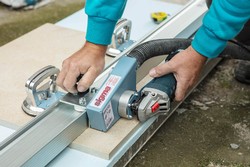 When cutting, proceed slowly and do not push. Use diamond discs to cut the sintered ceramic tiles.
 Insert the cut and ground ceramic strips into the skirting clips using an angular grinder with a grinding pad.
The finished ceramic leading edge of the balcony connects seamlessly to the finishing profile with a water bar.
 Measure the finish cuttings to the door and balcony wall. To define laying, use stops between the balcony wall and tiles; this will prevent the PVC sheet from being cut through by the edge of the tile adjacent to the wall.
 The laying on pedestals is suitable for terraces, balconies, roofs, or public spaces with trouble-free access to drains or waterproofing. Laying on pedestals is unsuitable for vehicular traffic.
You can also watch the workflow in the video:
Photogallery