
The modern ceramic terrace is enchanted even by a handyman
A modern ceramic terrace can be conjured up also by a handymanMost manufacturers recommend entrusting the installation of flooring materials to professionals. There are exceptions, though. The new RAKO Outdoor sintered tiles 2 cm thick can be laid in a gravel bed even by not very experienced enthusiasts. The terrace will look great and, moreover, it can be used virtually immediately. You can easily replace a damaged tile with a new one. Thanks to the uniform tile design, you can connect to your residential rooms and unify and visually enlarge the transition from the interior to the exterior. In addition to terraces, the QUARZIT, SALOON, REBEL PIAZZETTA and KAAMOS series tiles are also suitable for use on balconies, around the pool, in your pergola, on flat roofs, or just as pedestrian pavements integrated into grass.
The RAKO Outdoor sintered tiles 60 × 60 cm area and 2 cm thick are frost-proof and will withstand outdoor loads without any major limitations. Thanks to their fine relief and slip resistance R11/B class, they are suitable for building or renovating modern terraces, balconies, pool surrounds, pergolas, roofs or walkways. Their thickness and weight make them suitable for laying directly into the ground, for example, into a lawn, gravel or on plastic pedestals without the use of any adhesive or grout. Thanks to the digital printing technology, their quality and design are indistinguishable from the natural materials they imitate so faithfully. The stone design is shown by the Quarzit Outdoor and Kaamos Outdoor series, and the wood design, by the Saloon Outdoor series.
Advantages of laying in gravel
Laying in gravel is a cost-effective solution for terraces, pergolas and walkways. A terrace is completed quickly and with minimal tooling and material requirements. The possibility of easily replacing a damaged tile is a major benefit. The stability of the compacted gravel sub-base layer is critical for a long durability of this solution. A flat and well compacted gravel base is a prerequisite for the stability of the laying.
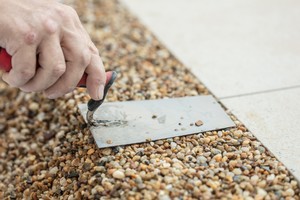
How to lay tiles in gravel for walking surfaces?
! A flat and well compacted gravel base is a prerequisite for the stability of the laying.
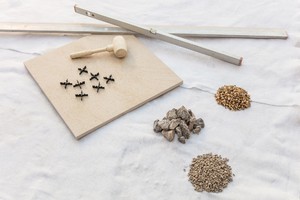
Prepare everything you need: coarse gravel (8–16 mm), finer gravel (4–8 mm), pebbles, small spacer crosses 3–4 mm wide for outdoor uses, a rubber mallet, spirit level, smoothing beam and, of course, RAKO OUTDOOR tiles 2 cm thick.
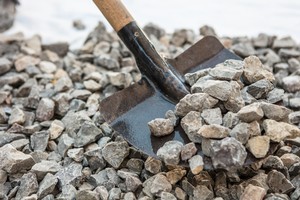
First, create a pavement sub-base layer: Remove soil from the future pavement area to a 25 cm depth. The excavation bottom surface should have a 2% slope from the building. Compact the soil with a vibrating plate. Lay a 20 cm layer of the coarse (8-16 mm) gravel and compact it again.
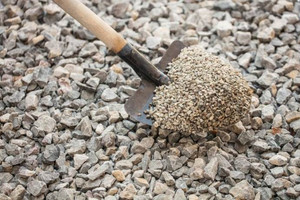
Second sub-base layer: Use the finer (4-8 mm) gravel for the second sub-base layer approximately 5 cm thick. The gravel layers should have the same height.
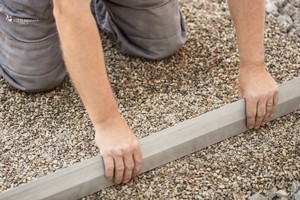
Base preparation: Spread the gravel evenly with a smoothing beam. No additional compaction is required.
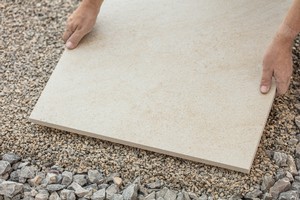
Tile placement: Place the tiles into gravel and fix them in place with a rubber mallet at a slope of 2% from the building.
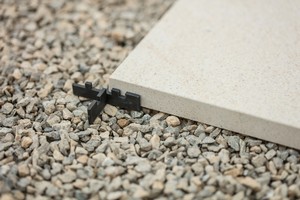
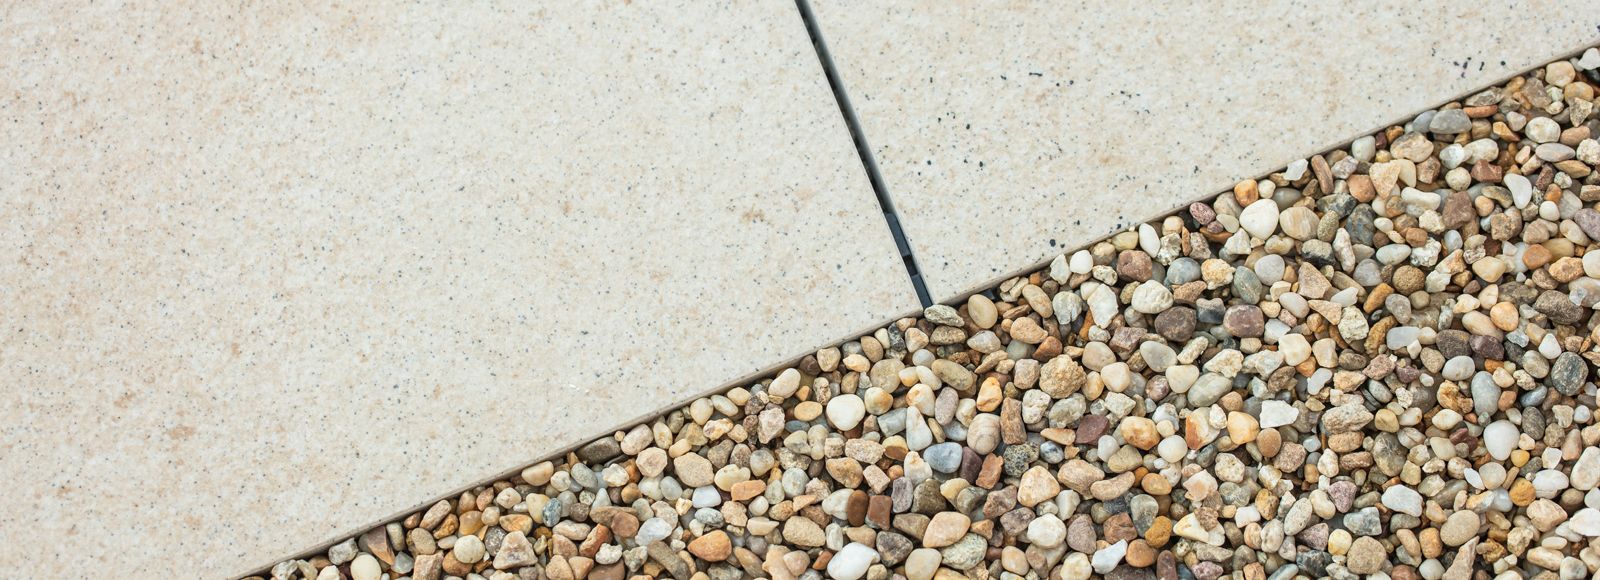
Defining the joints: Place the small spacer crosses for outdoor use 3–4 mm wide into the corners. This will ensure continuous water drainage and moisture evaporation from the base.
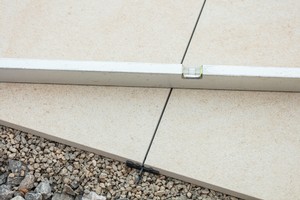
Surface: In this manner, lay the tiles on the entire surface, and continuously check the flatness of the tiles using a spirit level. Where appropriate, fix the surface with a rubber mallet, and where needed, add the fine gravel to under the tiles to level up any depression.
Bordering: Finally, decorate the tiled surface edges with pebbles or use grass. Fine silica sand can also be used to fill the joints.
You can also watch the workflow in the video:


